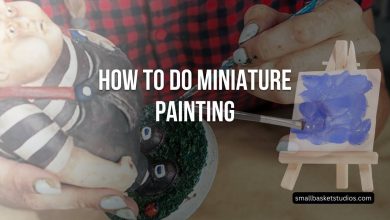
Miniature painting is an increasingly popular hobby among tabletop gaming fans and collectors, both as a pastime and an investment. Painting these miniature figures requires precision and intricacies that may prove both challenging and immensely fulfilling – this guide explores this world by looking specifically at painting Dungeons & Dragons characters, specifically Bone Devil miniatures from the Dungeons & Dragons universe; providing both novices and expert painters a comprehensive guide on how to paint and customize one!
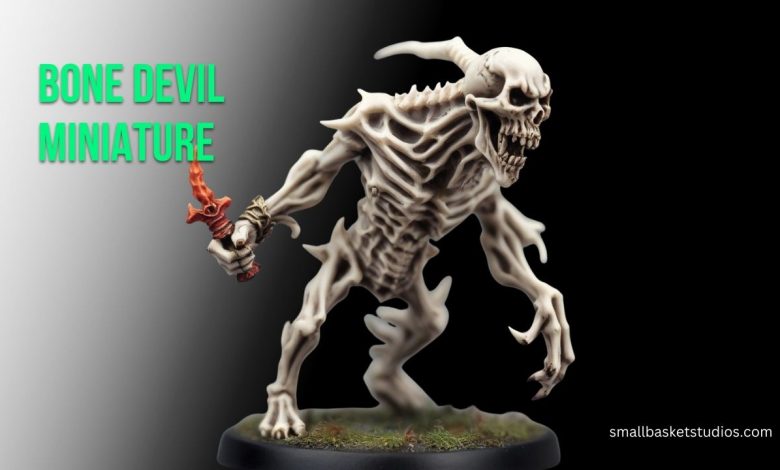
What is a Bone Devil Miniature?
A Bone Devil is a fiendish creature from the Dungeons & Dragons (D&D) universe. These grotesque beings are known for their skeletal appearance, devilish features, and formidable combat abilities. A Bone Devil miniature is a small-scale representation of this creature, typically made of plastic or resin, used for tabletop role-playing games like D&D or as collectible display pieces.
Why Paint Miniatures?
Painting miniatures is an enjoyable creative outlet that provides the chance to bring beloved characters and creatures from fiction alive in stunning detail. Additionally, painting adds visual depth and dimension to tabletop games and table adventures while relieving daily stressors. Taking up this hobby may even provide some respite from daily stress!
Materials and Tools
Before diving into the painting process, it’s crucial to gather the necessary materials and tools:
Bone Devil Miniature: Purchase or acquire the miniature you wish to paint. Ensure it is clean and free from mold lines and imperfections.
Paints: Acrylic paints are commonly used for miniatures. Brands like Citadel, Vallejo, and Reaper provide a wide range of colors specifically designed for miniature painting.
Brushes: Invest in a set of quality brushes with various sizes and shapes. You’ll need fine detail brushes for intricate work and larger brushes for base coating.
Palette: A palette is essential for mixing and diluting paints.
Water and Paint Thinner: To clean brushes and thin paints as needed.
Primer: Choose a suitable primer for miniatures. White or gray primers are versatile choices.
Workspace: Set up a well-lit and well-ventilated area with a comfortable workspace.
Painting Holder or Base: A holder or base for your miniature can make painting more comfortable and prevent smudging.
Magnifying Glass: Optional but helpful for precise detailing.
Now that you have your materials ready, let’s move on to the next step.
Preparation
Cleaning and Assembling the Miniature
Before you start painting, inspect your Bone Devil miniature for any imperfections such as mold lines, flash, or excess plastic or resin. Use hobby knives, files, or sandpaper to remove these imperfections carefully. Be cautious not to damage the miniature’s details in the process.
Once your miniature is clean and smooth, follow the manufacturer’s instructions to assemble it if it comes in multiple parts. Most miniatures come pre-assembled, but some might require gluing or pinning.
Priming the Miniature
Priming is a crucial step in miniature painting. It provides a base layer that helps paint adhere to the miniature’s surface and improves paint durability. Use a spray primer or brush-on primer in a well-ventilated area. Apply thin, even coats, and allow each coat to dry completely before adding another. White or gray primers are ideal for Bone Devil miniatures, as they provide a neutral base for your colors.
Workspace Setup
Create a comfortable and organized workspace with good lighting. Natural daylight or a bright LED lamp is preferred to accurately see colors and details. Ensure your workspace is well-ventilated to disperse any fumes from paints and primers. Having all your tools within easy reach will make the painting process more efficient.
With your Bone Devil miniature cleaned, assembled, and primed, you’re ready to move on to the exciting part: painting!
Color Selection and Planning
Choosing a Color Scheme
Selecting the right color scheme is essential for capturing the essence of your Bone Devil. While you can choose any colors you like, consider the following:
Traditional: Staying true to D&D lore, you can use bone-white, crimson red, and dark, infernal blacks for a classic Bone Devil appearance.
Custom: Get creative! Experiment with unique color combinations to give your Bone Devil a distinctive look.
Reference: Refer to D&D source materials, illustrations, or other miniatures for inspiration.
Creating a Palette
Create a palette of colors you’ll use for your Bone Devil. Start with the base colors you’ll need for the skin, armor, and other major features. Include a range of shades and tones to add depth and highlights. As a beginner, having a limited palette can simplify the painting process.
Planning Your Approach
Before applying paint to your miniature, plan your approach. Decide which areas you’ll tackle first and in what order. Generally, it’s best to start with larger areas and work your way to finer details. Having a plan in place will help you stay organized and avoid smudging or overlapping colors.
Painting Techniques
Base Coating
Begin by applying the base coat, which is the primary color for each area of your miniature. Thin your paint with water or a paint thinner to achieve a smooth, even application. Use a larger brush for this step and apply multiple thin layers if needed, allowing each layer to dry before the next.
Layering and Highlighting
Layering involves adding progressively lighter colors to create highlights and depth. Use a smaller brush and a steady hand for this step. Focus on raised areas like muscles and edges of armor. Layering gives your Bone Devil a more realistic and three-dimensional appearance.
Dry Brushing
Dry brushing is a technique for adding texture and highlights to surfaces. Load a dry brush with a small amount of paint and then remove most of it by brushing it onto a paper towel. Gently brush the raised surfaces of your miniature, allowing the paint to catch on the edges, creating a weathered effect.
Washes and Glazes
Washes are thin, watery paint applications that settle into recesses, adding shadows and depth. Glazes are similar but are translucent and used to tint an area. Apply washes and glazes sparingly to avoid overpowering your miniature’s details.
Blending
Blending is an advanced technique that involves smoothly transitioning between colors to create gradients. This technique requires practice but can produce stunning results. Use a wet palette to keep your paints workable for longer and practice blending on spare surfaces before attempting it on your Bone Devil.
Details and Texture
Eyes, Teeth, and Horns
Focus on the eyes, teeth, and horns of your Bone Devil. These small details can make a big difference in the overall look of your miniature. Use a fine detail brush and a steady hand to paint the eyes. Start with a dark color for the eye sockets, then add a smaller dot of a brighter color for the iris.
Use layering and dry brushing for teeth and horns to create a natural and aged appearance. Apply a light-coloured base, add shading, and highlight the tips for a realistic effect.
Adding Texture to Skin and Armor
To give your Bone Devil’s skin and armor a textured look, consider using techniques like stippling (dabbing a brush to create a textured effect) or adding small scratches and battle scars with fine lines. This adds character and depth to your miniature.
Freehanding Designs
If you’re feeling adventurous, you can freehand designs or patterns on the Bone Devil’s armour or skin. This requires a steady hand and a lot of practice. Start with simple designs and work your way up to more intricate patterns.
Basing
Selecting a Base
The base of your miniature is an important part of the overall presentation. Consider the environment your Bone Devil inhabits. You can use pre-made bases or create custom ones using materials like cork, sand, or small rocks. Ensure the base complements the theme and color scheme of your miniature.
Painting and Decorating the Base
Paint the base to match your chosen environment. For a Bone Devil, a dark, infernal theme could include blackened earth, fiery cracks, or pools of blood. Add small scenic elements like grass, skulls, or rubble to enhance the base’s appearance. Glue your miniature securely to the base once you’re satisfied with the design.
Sealing and Protecting
Varnishing Your Miniature
Protect your hard work by applying a clear varnish once your Bone Devil is fully painted and based. Matte varnish is commonly used as it provides protection without adding shine. Gloss varnish can be used selectively to create a wet or reflective look on specific areas like eyes or blood.
Protecting Your Work
Store your finished miniature in a safe place, ideally in a display case or cabinet to prevent dust and damage. Handle it carefully to avoid chipping or scratching the paint. With proper care, your Bone Devil can remain a stunning piece for years to come.
Showcasing Your Miniature
Displaying Your Bone Devil
Your completed Bone Devil miniature is a work of art. Showcase it proudly on your gaming table or in a display case. Share it with friends and fellow hobbyists to inspire and be inspired by their work.
Sharing Your Work Online
Join online communities and forums dedicated to miniature painting. Share your progress and finished pieces to receive feedback and connect with other enthusiasts. Websites like Instagram, Reddit, and hobby-specific forums are great platforms for sharing your work.
FAQs
What type of paint should I use for my Bone Devil miniature?
Acrylic paints specifically designed for miniature painting are the best choice. Brands like Citadel, Vallejo, and Reaper offer a wide range of colors suitable for miniatures.
How do I fix mistakes when painting a miniature?
Mistakes happen, even to experienced painters. You can correct errors by carefully painting over them with the correct color once the previous layer is dry. In extreme cases, you may need to strip the paint and start over.
What are some advanced techniques for experienced painters?
Experienced painters can explore advanced techniques like non-metallic metal (NMM) for creating realistic metal effects, object source lighting (OSL) to simulate glowing effects, and freehanding intricate designs.
Can I customize my Bone Devil miniature with additional features?
Absolutely! You can modify your miniature by adding extra details like chains, spikes, or unique features that align with your creative vision. Just ensure the additional parts are securely attached.
Where can I find inspiration for my Bone Devil’s design?
Look to D&D source materials, art books, online galleries, or other miniature painters’ work for inspiration. Personalize your Bone Devil based on your interpretation of the creature.
How long does it take to paint a Bone Devil miniature?
The time it takes to paint a Bone Devil varies depending on your skill level and the level of detail you want to achieve. It can take anywhere from a few hours to several days or even weeks for highly detailed work.
What safety precautions should I take when painting miniatures?
Ensure proper ventilation when using paints and primers. Use a respirator mask if necessary. Keep your workspace clean and organized to prevent accidents. Additionally, store your paints and brushes away from children and pets.
Conclusion
Painting a Bone Devil miniature can be both an enjoyable and satisfying experience, whether or not you are an experienced miniature painter. Following the steps laid out here and practising your painting techniques, you can produce an eye-catching representation of this iconic D&D creature – patience is the key to increasing your painting abilities! So gather all your materials, unleash your creative side, and start making this miniature come to life on your tabletop or display shelf! Happy Painting!