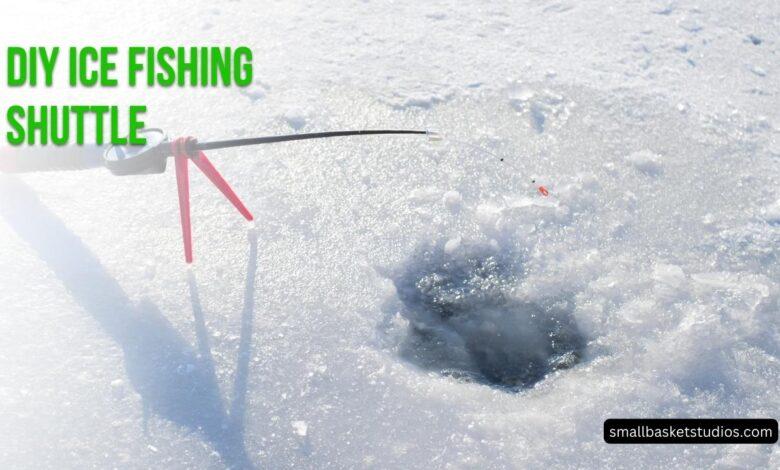
Building Your Own DIY Ice Fishing Shuttle
Going ice fishing is an exciting winter adventure that allows anglers to access frozen lakes and drop lines through the ice. However, trekking equipment across the ice can be cumbersome and tiresome. An ice fishing shuttle provides a convenient transportation solution to haul all your gear to your favorite frozen fishing hole with ease.
Purchasing a ready-made ice fishing sled or shuttle can cost over $250. With some handy materials, basic tools, and DIY knowledge, you can build your own custom ice fishing shuttle for a fraction of the price. This do-it-yourself, motorless sled provideseffortless mobility on the ice at an affordable cost.
DIY Ice Fishing Shuttle
Ice fishing is a popular cold weather sport across northern U.S. states as well as Canada. According to statistics from the American Sportfishing Association, over 1.4 million Americans went ice fishing in 2019.
Transportingcumbersome ice fishing equipment like an ice auger, rod/reel combos, tackle, bucket, cooler, and portable shelter can be extremely difficult without some form of sled or conveyance device. Commercial ice fishing sleds sell for $250 to $500 depending on the size and features.
Purchasing or renting an ice fishing shuttle for each outing can get expensive. Constructing your own DIY ice fishing sled allows you to customize the design to perfectly fit your needs and saves you significant money in the long run.
This article provides detailed instructions on selecting materials, critical construction steps, and customization options to consider when building your own ice fishing shuttle from scratch.
Materials and Tools Needed
Before you start building your ice fishing shuttle, gather the following materials and tools:
Materials:
- 1/2-inch plywood sheets – the floor and sides are constructed from weather resistant plywood that will withstand moisture.
- 2×4 lumber – these are used to build the frame and supports.
- 1-inch dowel rods – the dowels create holes to thread rope through to attach accessories.
- 3/4-inch PVC pipe – PVC tubing constructs the handles and support structure.
- PVC connectors and caps – necessary to connect the PVC piping.
- Screws and bolts – for securing the wood frame and PVC components.
- Nuts and washers – used with screws and bolts to hold everything in place.
- Bungee cords – provide expandable cover fastening.
- Rope or straps – used to secure equipment during transport.
- Foam padding – for comfortable pulling and covering sharp corners.
- Hinges – attach the folding front wall.
- Paint and primer – protect and customize the appearance.
- Waterproof sealant – seals the wood to prevent water damage.
Tools:
- Circular or jig saw – cut plywood and lumber to size.
- Drill + drill bits – create holes for dowels, piping, screws.
- Wrench – tighten bolts and connectors.
- Screwdriver – drive screws into plywood and lumber.
- Safety gear – gloves, eye protection, dust mask.
Constructing the Frame
The frame provides the structural foundation upon which you assemble the rest of the ice fishing sled. Complete the following steps to build a sturdy frame tailored to your desired shuttle size:
- Cut 2×4 lumber supports to length with a circular or jig saw. Construct a rectangular base frame and two side frames with the lumber.
- Use corner braces and screws to join the frames together into a rigid box structure. Verify the assembled frame matches your expected interior compartment dimensions.
- Drill 1-inch holes through the side frames to thread bungee cords or ropes through for strapping down equipment.
Table 1 shows estimated lumber requirements for different recommended frame sizes:
Table 1. Lumber Needed for Frame
| Shuttle Size | Lumber Needed |
|---|---|
| 30″ x 48″ | 3 @ 8ft 2x4s |
| 36” x 60” | 5 @ 8ft 2x4s |
| 48″ x 72″ | 6 @ 8ft 2x4s |
Add cross members and an overhead bar to attach the pulling harness to for larger sized frames.
Attaching the Plywood Floor
With the frame fully constructed, the next step is attaching a plywood floor:
- Cut 1/2-inch plywood to match the interior base frame dimensions or slightly smaller to fit inside the 2×4 supports.
- Pre-drill holes and use wood screws to securely fasten the plywood floor to the base frame. Make sure it is centered within the 2×4 edges.
- Seal weatherproof all exterior edges and surfaces with waterproof sealant once secured. Let the sealant dry fully per the manufacturer instructions.
The plywood floor will support all your equipment weight while moving across the ice. Verify it feels sturdy once mounted within the frame.
Adding Side Walls and Front Cover
Create protective barriers around your cargo space by adding plywood side walls and a folding front cover:
- Cut 1/2-inch plywood sheets to create front, back, and side walls based on interior frame dimensions. Wall height is 6-12 inches typical.
- Hinge the plywood cover piece to act as a front folding wall for easy access.
- Attach bungee cords or straps around the external perimeter to hold the cover closed during transport.
- Seal all wall plywood edges with waterproof sealant and let fully cure before mounting within the frame.
- Pre-drill then screw walls securely into frame supports using exterior grade screws.
Enclose the entire frame structure with plywood by also creating a back wall or leave open. Personalize enclosure preferences for your specific shuttle design.
Installing Pulling Handles
Adding handles makes pulling your loaded ice fishing shuttle easy across frozen lakes. Here are two handle options to consider installing:
PVC Pipe Handles
- Measure and cut six 1-1.5” diameter PVC pipe segments to use as vertical supports and grips.
- Mount three evenly spaced PVC tubes perpendicular along each 60” side wall using connectors.
- Ensure the handles align with average arm height for comfortable pulling and leverage.
- Add PVC end caps and foam padding for grip comfort.
Wooden Dowel Rods
- Drill 1” holes through the vertical side walls at arm height.
- Feed rope through each outer hole, inner hole and tie-off ends.
- Thread 1” wooden dowels through the rope loops and knot rope ends.
- Wrap foam or tape around dowels for padding.
Install handles that match your height and grip preference for optimal control and pulling performance.
Customizing Your Shuttle
Personalizing your DIY ice fishing shuttle with accessories creates additional convenience and functionality:
- Storage bags – Attach mesh bags or cubes to the interior sides to organize equipment.
- Rod holders – Mount PVC rods or tubes to protect rigs during transport.
- Cup holders – Bolt or glue cup holders to store drinks or loose items.
- Seat mount – Install a swivel seat bracket on front wall to use as a chair.
- Ski blades – For trail use, screws skis or blades to the underside.
- Hitch clevis – Weld a trailer hitch clevis to back if you want to tow behind a snowmobile or ATV.
Include any useful add-ons to maximize the capabilities based on your intended shuttle usage. Get innovative modifying for specialized winter fishing needs.
Finish Work
Apply the final touches to complete construction of your DIY ice fishing sled:
- Sand rough edges and corner smooth.
- Prime and paint the exterior to protect and customize colors.
- Waterproof seal all exposed wood surfaces including drilled holes.
- Attach foam cushions along the base frame and front wall for padding protection.
- Add reflectors or safety tape for visibility around corners and crevices.
Completing sanding, painting, sealing and accessory mounting finishes the job. Enjoy hauling your ice fishing arsenal with ease using your custom built shuttle this winter season.
Frequently Asked Questions
What size shuttle should I build?
Choose interior dimensions based on the amount of equipment you need to transport. Standard shuttles are 30-36 inches wide and 48-72 inches long. Match to the length of your portable ice shelter for easy towing.
What features should I include?
Add accessories like rod holders, storage bags, hitches, etc. based on your specific ice fishing needs. Think about how you intend to use the shuttle when adding custom elements.
Where can I find the materials and tools?
The required plywood, lumber, hardware and tools are available at most home improvement stores. Some plastic and metal components may need to be ordered online depending on local retailer inventory.
How do I construct this if I’m not handy?
All the steps utilize basic tools and construction techniques, but having some woodworking experience is helpful. If you are not skilled at building things yourself, consider hiring a handyman to complete the project.
What maintenance does this require?
Periodically check for any cracks or damage. Repair issues immediately to prevent exacerbation over time. Store indoors during off-season and re-apply protective sealant as needed.
Conclusion
Constructing your own DIY ice fishing shuttle takes some handy skills, but provides an extremely useful and customizable sled transportation solution. This affordable winter gear hauler eliminates having to manually carry heavy equipment across frozen lakes and assembles exactly to your needs. Include helpful accessories for even greater fishing mobility convenience.
Follow the instructions to build a hardy wood-framed foundation, seal from the elements, and install handles and components to match your ideal feature set. Painting to personalize the appearance and adding specialty mountings tailors perfectly to your ice angling hobby. Enjoy the benefits of effortless transportation out to your favorite frozen fishing lake spots using quality gear carried safely in your custom shuttle this winter.
Stay warm and keep those lines wet in your DIY ice fishing shuttle!